The first time a homemade Chicken Katsu Bento Box went into the fridge for the next day’s lunch, there was this tiny moment of doubt—would the chicken still be crisp, would the rice clump, would it all just feel…sad by noon? A few hours later, standing over a desk instead of a cozy kitchen, that same bento turned out to be the kind of meal that makes you stop, breathe, and actually enjoy lunch again: crunchy golden chicken, warm-tasting rice, bright vegetables, and a hit of tangy sauce in every bite. That balance of texture and flavor is exactly what makes this Chicken Katsu Bento Box feel special but still weeknight-easy, the kind of thing you can throw together after work and be quietly proud of when you crack it open the next day.
This version keeps that classic combo—crispy breaded chicken, furikake-sprinkled rice, and simple veggies—while gently simplifying the steps so it fits into real life. Think pounded chicken that cooks fast, sides you can prep while the oil heats, and a layout that keeps everything neat and satisfying inside the box. Once you make it a couple of times, you start to customize it without even thinking about it, swapping veggies, changing the sauce, and turning this Chicken Katsu Bento Box into your personal signature lunch.
Why this bento works
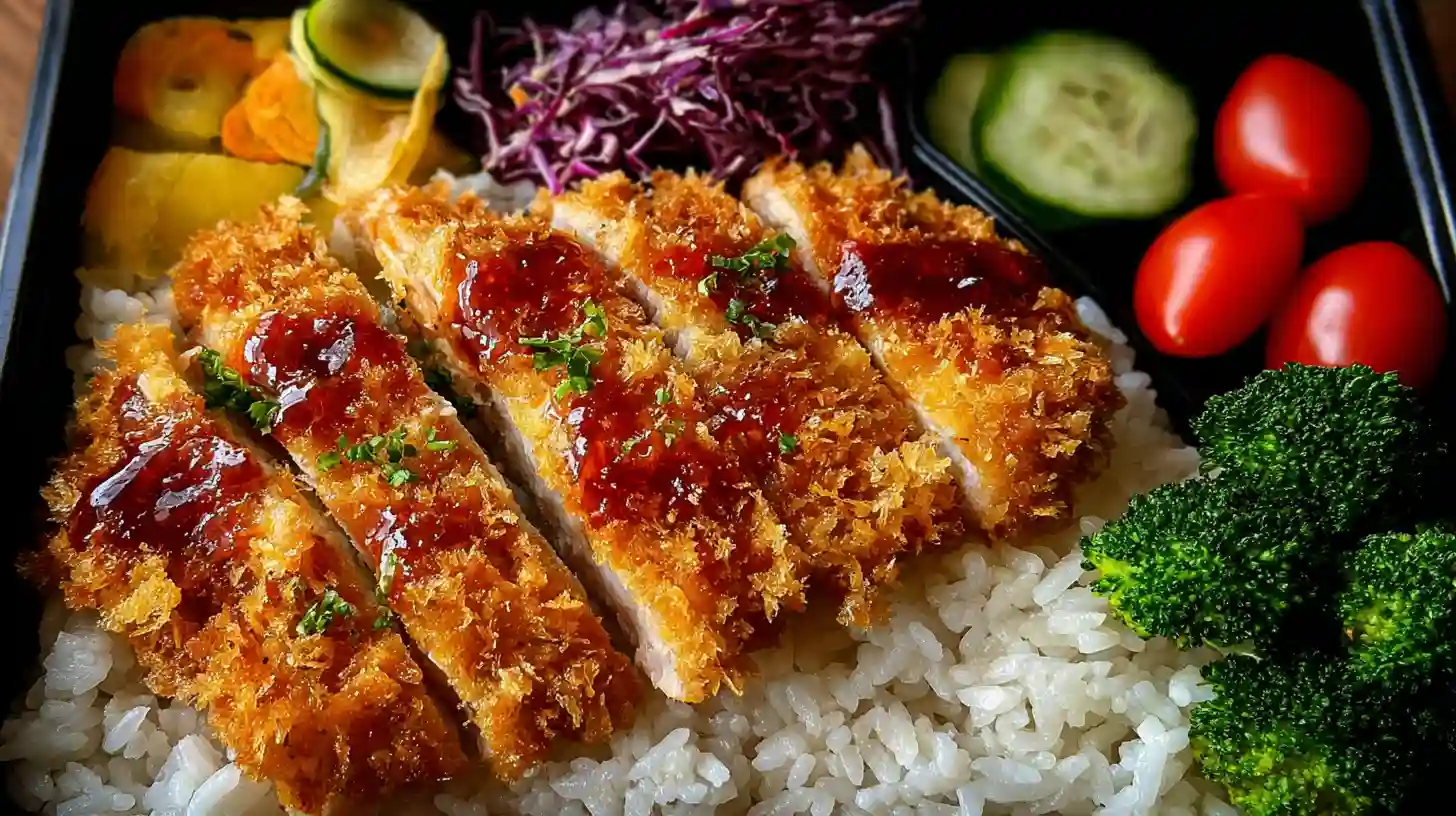
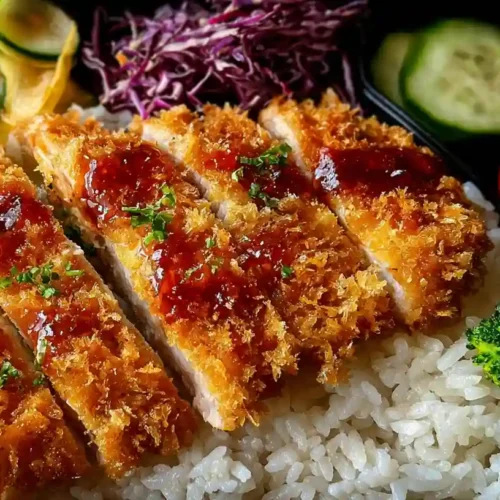
At its heart, a Chicken Katsu Bento Box is just smart layering: protein for staying power, rice for comfort, and vegetables for crunch and freshness. The chicken is coated in panko so it fries up light and shatter-crisp, while the rice gets a sprinkle of furikake for little pops of sesame and seaweed in every forkful. Broccoli, cherry tomatoes, and quick-pickled red cabbage bring color and brightness, so each bite feels balanced rather than heavy.
Even better, this bento is designed to pack and travel well. The chicken holds its crunch when cooled properly, the rice doesn’t need to be piping hot to taste good, and the veggies stay vibrant as long as they’re not drowning in sauce. Keep the tonkatsu-style sauce in a small container on the side, and you get that satisfying drizzle right before eating without sacrificing texture.
Ingredients for Chicken Katsu Bento Box
Katsu chicken components
- Boneless chicken breast, pounded to an even thickness so it cooks fast and stays juicy.
- All-purpose flour to grab onto the egg and create a light base layer.
- Beaten egg to help the panko cling to the chicken.
- Panko breadcrumbs for that airy, ultra-crisp coating associated with katsu.
- Salt, pepper, and a little garlic powder to season the cutlets before breading.
- Neutral frying oil such as vegetable, canola, or sunflower, which won’t compete with the flavor of the chicken.
Rice and veggie sides
- Cooked white rice, slightly cooled so it stays fluffy instead of gummy in the bento.
- Furikake, a sesame and seaweed blend that turns plain rice into something you actually crave.
- Broccoli florets, briefly blanched and finished with sesame oil and sesame seeds.
- Cherry tomatoes for juicy freshness and a little sweetness.
- Thinly sliced red cabbage tossed with rice vinegar for a quick, tangy pickle.
- Tonkatsu-style sauce, either store-bought or a quick mix of ketchup, soy sauce, and Worcestershire.
How to make the Chicken Katsu Bento Box
Prep and bread the chicken
Start by laying the chicken between pieces of baking paper and gently pounding until the thickness is even from edge to edge; this little step prevents dry spots and helps the coating cook evenly. Pat the pieces dry, then season both sides with salt, pepper, and garlic powder so the flavor gets into the meat rather than just sitting on the crust.
Set up a simple three-dish station: flour in the first, beaten egg in the second, and panko in the third. Dredge each piece of chicken in flour, tap off the extra, dip in egg, then press it firmly into the panko to create a thick, even coat that clings well.
Fry the katsu and cook the sides
Warm a shallow layer of oil in a skillet over medium heat; when a pinch of panko sizzles on contact, you’re ready to fry. Cook the chicken for about 3–4 minutes per side, or until the crumbs turn deep golden and the center reaches an internal temperature of 75°C (165°F).
Transfer the cooked cutlets to a plate lined with paper towels so excess oil can drain and the coating stays crisp while it cools. For a lighter option, you can bake at around 200°C or air fry at 190°C until the coating is crunchy and the chicken is cooked through, flipping once halfway.
While the chicken rests, fluff the cooked rice and sprinkle it with furikake so the seasoning distributes without clumping. Blanch the broccoli in salted boiling water for 1–2 minutes, shock it in cold water to keep the color bright, then toss with a little sesame oil and sesame seed. For the cabbage, stir together thin shreds with rice vinegar and a touch of sugar or salt and let it sit for 10–15 minutes to lightly pickle.
Assemble your bento
Slice the rested chicken into neat strips so you can see that juicy center against the crisp crust. In your bento box, add a bed of furikake rice to one side, tuck the sliced Chicken Katsu Bento Box portion either on top of the rice or alongside it, then fill the remaining sections with sesame broccoli, pickled cabbage, and cherry tomatoes.
Drizzle tonkatsu sauce over the chicken right before eating, or pack it in a tiny lidded container so you can dip each piece. The box can be enjoyed slightly warm or at cool room temperature, making it ideal for work, school, or a relaxed lunch at home.
Pro tips for the best katsu bento
- Keep the panko dry and fluffy; if it looks compacted, lightly crush it between your fingers to loosen before breading.
- Let the fried chicken rest a few minutes before slicing so the juices settle and the coating doesn’t slide off.
- Cool rice slightly before adding furikake so the seasoning doesn’t clump or melt.
- Pack sauce separately to protect the crisp texture of the katsu and the bite of the vegetables.
Variations you can try
Once you are comfortable with the basic Chicken Katsu Bento Box, it becomes a template you can tweak endlessly. For a heartier option, serve the katsu with a simple Japanese-style vegetable curry spooned into a separate compartment, or turn it into more of a katsu curry lunch by pairing the chicken with saucy potatoes and carrots.
For a lighter or meat-free spin, swap the chicken for tofu cutlets or your favorite plant-based alternative and use a vegan “egg” to help the panko stick. You can also rotate in different sides like boiled eggs, pickled daikon, cucumber salad, or edamame to keep the bento interesting through the week.
Substitutions that still taste great
- Use boneless chicken thigh instead of breast if you prefer a richer, more forgiving cut that stays juicy even if slightly overcooked.
- When furikake isn’t available, sprinkle the rice with sesame seeds and a pinch of sea salt for a simple but tasty upgrade.
- Swap broccoli for green beans, snap peas, or edamame if that’s what you have on hand.
- If you don’t have bottled tonkatsu sauce, mix ketchup, soy sauce, and Worcestershire to get a similar sweet-savory profile.
Storage and serving tips
For best texture, let fried chicken cool slightly on paper towels, then move it to an airtight container and refrigerate for up to about 24 hours. Keep the sauce in a separate small container and avoid packing the katsu directly against very wet ingredients.
When packing the Chicken Katsu Bento Box for later, arrange rice at the bottom, chicken on top or beside, then tuck the vegetables into their own sections to prevent moisture from spreading. The bento should not sit at room temperature for more than a couple of hours; keep it chilled and let it warm slightly before eating if desired.
Troubleshooting common issues
- If the coating falls off, the chicken may have been too wet or handled too soon after frying; pat dry before breading and slice only after a brief rest.
- If the crust feels pale and greasy, the oil was likely not hot enough—wait for a steady sizzle when you drop in a crumb of panko.
- If the rice becomes mushy, use a little less water next time and let it steam with the lid on before fluffing.
- If the vegetables taste flat, add a pinch of salt or a splash of vinegar right before serving to brighten them.
Chicken Katsu Bento Box FAQs
- What is chicken katsu? It is a Japanese-style breaded cutlet made by coating seasoned chicken in flour, egg, and panko, then frying until crisp and golden, often served with rice and tangy sauce.
- Can I make this ahead for the week? The chicken and sides can be prepared in advance, but for the best texture, fry the katsu no more than a day ahead and keep sauce separate until serving.
- How many servings does one batch make? Using two medium chicken breasts and a cup of cooked rice typically yields about two generous bento portions, depending on appetite and side dish amounts.
- Is there a way to reduce the calories? Baking or air-frying the katsu, using a bit less oil, and slightly reducing the rice portion are easy ways to lighten the meal without losing too much satisfaction.
- Can I use brown rice instead of white? Yes, brown rice gives a heartier texture and extra fiber; just be sure to cook it until tender and fluff it well before adding furikake.
- What is the difference between katsu and katsu-don? Katsu is the fried cutlet itself, while katsu-don usually serves the cutlet over rice with a sweet-savory sauce and lightly cooked egg on top.
- How long can the bento sit out? Treat it like any cooked chicken dish: keep it chilled and avoid leaving it at room temperature for longer than about 2 hours for food safety.
Chicken Katsu Bento Box
Ingredients
For the chicken katsu
- 2 boneless chicken breasts pounded to even thickness
- 0.5 cup all-purpose flour
- 1 large egg beaten
- 1 cup panko breadcrumbs
- 0.5 tsp salt plus more to taste
- 0.25 tsp black pepper
- 0.25 tsp garlic powder
- 0.75 cup neutral frying oil such as vegetable or canola
For the rice and sides
- 1 cup cooked white rice slightly cooled
- 1 tbsp furikake
- 1 cup broccoli florets
- 1 tsp sesame oil
- 1 tsp sesame seeds
- 0.5 cup shredded red cabbage
- 1.5 tbsp rice vinegar
- 0.5 tsp sugar optional, to balance acidity
- 0.5 cup cherry tomatoes left whole or halved
For the sauce
- 3 tbsp tonkatsu sauce or mix of ketchup, soy sauce, and Worcestershire
Instructions
- Place the chicken breasts between sheets of baking paper and gently pound with a rolling pin or mallet until evenly thin. Pat dry and season both sides with salt, pepper, and garlic powder.
- Set up a breading station with flour in one shallow dish, beaten egg in a second, and panko breadcrumbs in a third. Dredge each chicken piece in flour, tap off excess, dip in egg, then press firmly into the panko to coat all sides.
- Heat a shallow layer of neutral oil in a skillet over medium heat until a pinch of panko sizzles on contact. Fry the breaded chicken for about 3–4 minutes per side, or until deeply golden and cooked through to an internal temperature of 75°C (165°F).
- Transfer the cooked cutlets to a plate lined with paper towels and let them rest for about 5–10 minutes so excess oil drains and the coating stays crisp. Slice the rested chicken into strips.
- While the chicken cooks, fluff the cooked rice and sprinkle it with furikake. Toss gently so the seasoning is evenly distributed without crushing the grains.
- Blanch the broccoli florets in lightly salted boiling water for 1–2 minutes, then transfer immediately to cold water to stop the cooking. Drain well and toss with sesame oil and sesame seeds.
- In a small bowl, combine shredded red cabbage with rice vinegar and sugar, if using. Toss and let stand for 10–15 minutes to lightly pickle, then drain off any excess liquid.
- To assemble each bento, add a layer of furikake rice to one section of the box. Arrange sliced chicken katsu either on top of or beside the rice. Fill the remaining sections with sesame broccoli, pickled cabbage, and cherry tomatoes.
- Pack tonkatsu sauce in a small separate container. Refrigerate the bento until serving and drizzle or dip the chicken in sauce just before eating.