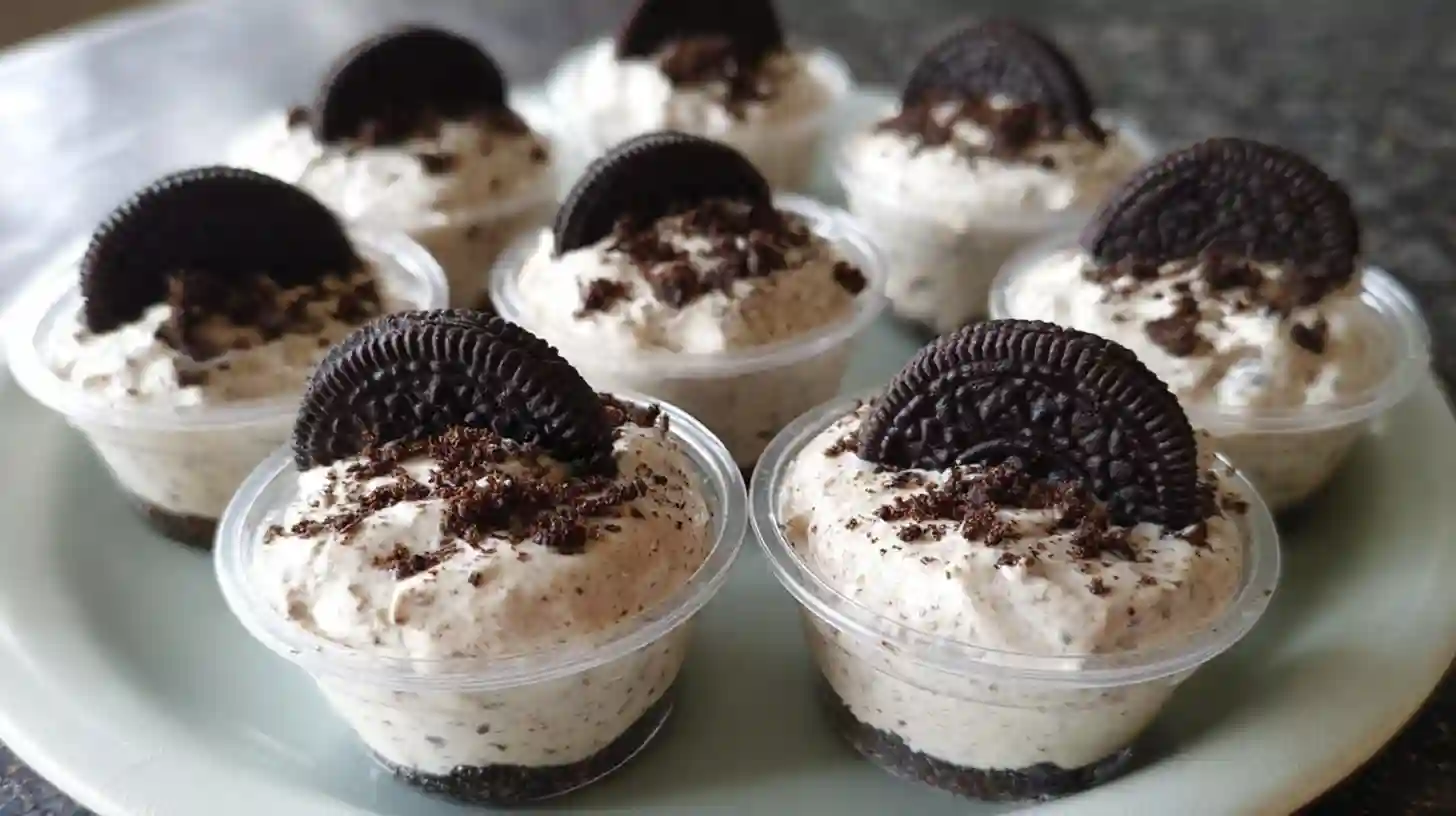
There’s something wildly satisfying about cracking open a plastic lid to find layers of crushed Oreo cookies mingling with silky, whipped cream filling. Maybe it’s the way the dark crumbs catch the light, or how the first spoonful somehow tastes both indulgent and impossibly airy. Cookies and Cream Dessert Cups deliver that exact feeling without turning on an oven or spending hours in the kitchen.
These little wonders became my go-to after a neighbor’s potluck where someone brought a similar treat. The cups vanished before the main course even hit the table. Since then, they’ve been my secret weapon for bake sales, birthday parties, and those moments when only a handheld dessert will do.
What Makes Dessert Oreo Cups Special
Unlike full-sized cheesecakes that require water baths and precise oven temperatures, these Oreo Cookie Dessert Cups thrive on simplicity. Each portion sits nestled in a clear 2-ounce cup, showcasing the contrasting layers like a miniature parfait. The base starts with pulverized chocolate sandwich cookies mixed with melted butter—a shortcut crust that firms up in minutes.
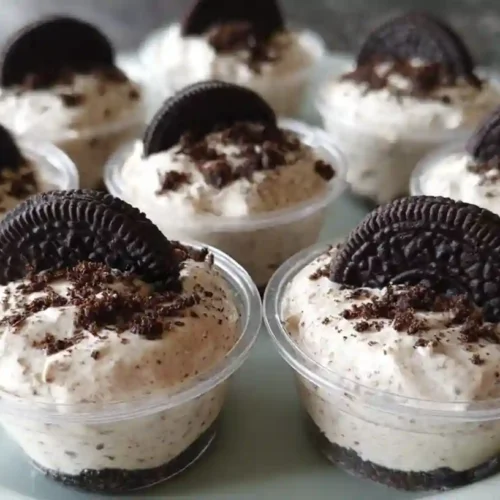
On top, a lightly sweetened cream cheese mixture gets whipped with heavy cream until it turns cloud-like, then folded with more cookie pieces for texture. A mini Oreo perched on the surface acts as both garnish and promise of what lies beneath.
The beauty of these Individual Oreo Cheesecake Cups is their portability. Lidded cups mean you can stack them in a cooler for outdoor gatherings without worrying about frosting smears or collapsed layers. They hold their shape for two to three days in the fridge, making them ideal for prep-ahead scenarios. At a dessert restaurant or upscale event, they’d look right at home alongside tiramisu and panna cotta, yet they’re humble enough for a backyard picnic.
Ingredients for Oreo Dessert Cup Recipe
The ingredient list reads like a grocery run you could complete in under ten minutes. You’ll need a standard package of chocolate sandwich cookies—the kind with white filling sandwiched between two cocoa wafers. About half gets crushed into fine crumbs for the base, while the remainder adds chunks to the filling. Unsalted butter works best since the cookies already carry salt, but salted butter won’t ruin anything if that’s what’s on hand.
Cream cheese should sit at room temperature for at least thirty minutes; cold blocks turn grainy when beaten. Granulated sugar sweetens without the molasses notes of brown sugar, keeping the flavor clean. Heavy whipping cream provides the volume and stability that makes the filling hold its shape when piped. A splash of vanilla extract rounds out the taste, though you could swap in almond extract for a subtle twist. Finally, mini Oreos or extra cookie crumbs crown each cup.
- Chocolate sandwich cookies (Oreos or similar brand)
- Unsalted butter, melted
- Cream cheese, softened to room temperature
- Granulated sugar
- Heavy whipping cream
- Vanilla extract
- Mini chocolate sandwich cookies for topping
Step-by-Step Instructions for Dessert Cups Oreo Style
Start by processing the cookies in a food processor until they resemble coarse sand. If you don’t own a food processor, seal the cookies in a zip-top bag and crush them with a rolling pin—therapeutic and effective. Transfer the crumbs to a bowl and drizzle in the melted butter, stirring until every speck looks damp. The mixture should clump slightly when squeezed. Scoop about a tablespoon into each plastic cup, then press it down firmly with the bottom of another cup. This creates a compact layer that won’t crumble when you dig in later.
In a separate bowl, beat the softened cream cheese and sugar with an electric mixer on medium speed. Scrape the sides occasionally to catch any lumps. Once the mixture looks smooth and fluffy—usually two minutes—pour in the heavy cream and vanilla. Increase the speed to medium-high and whip until stiff peaks form, which takes another three to four minutes. The filling should hold its shape when the beaters are lifted. Gently fold in the reserved cookie crumbs using a spatula, taking care not to deflate the airy texture you just built.
Transfer the filling to a large piping bag fitted with a wide round tip, or simply snip off the corner of a disposable bag. Pipe the mixture into each cup until it reaches about three-quarters full, leaving room for the garnish. Press a mini Oreo into the top of each cup, or sprinkle additional crumbs if mini cookies aren’t available. Snap on the lids and refrigerate for at least two hours before serving. The chilling time allows the flavors to meld and the texture to set just enough without becoming overly firm.

Bake Sale Desserts That Actually Sell
If you’ve ever hauled trays of brownies to a school fundraiser, you know the sinking feeling of watching them sit untouched while someone else’s sparkly cupcakes disappear. These Oreo Dessert Cup Recipe creations sidestep that problem entirely. Their grab-and-go format appeals to busy parents who don’t want crumbs in the car, and the clear cups show off the layers in a way that opaque containers can’t. Price them at two or three dollars each—enough to reflect the quality ingredients without scaring off buyers—and watch them vanish.
Other strong contenders for Baked Goods Fundraiser Ideas include lemon bars cut into precise squares, chocolate chip cookie dough brownies wrapped in cellophane, and s’more-inspired treats that tap into nostalgia. But dessert cups hold a unique advantage: they look expensive and taste homemade, a combination that’s hard to beat. If you’re planning a bake sale, consider making two or three flavor variations—vanilla pudding cups with Nilla wafers, strawberry cheesecake cups with graham cracker crusts, or even S’more Pudding Cups layered with marshmallow fluff. Variety draws the eye and encourages people to buy multiples.
Pro Tips for Perfect Results
Room temperature cream cheese is non-negotiable. Cold cream cheese forms tiny lumps that no amount of beating will smooth out, and you’ll end up with a grainy filling that lacks the silky mouthfeel these cups are known for. Leave the package on the counter for at least half an hour, or microwave it in ten-second bursts if you’re in a rush—just don’t overheat it into a puddle. Similarly, heavy cream whips best when it’s cold, so pull it from the fridge right before you need it.
When pressing the cookie crust into the cups, apply firm, even pressure. A loose base will shift when you pipe in the filling, creating an uneven layer that looks sloppy. Using the bottom of an empty cup as a tamper gives you consistent results every time. If you prefer to avoid single-use plastic, swap the disposable cups for small glass jars or ramekins—they’re reusable and add a rustic charm, though they’ll take up more fridge space.
For piping, a large round tip works better than a star tip because it minimizes air pockets. If you notice the filling becoming too soft to hold its shape while you work, pop the piping bag in the fridge for ten minutes. The chilled filling will firm up slightly, making it easier to pipe neat swirls. And don’t skip the chilling time at the end—rushing this step means the layers won’t have time to set, and you’ll end up with a soupy mess instead of structured elegance.
Creative Variations to Try
Once you’ve mastered the basic recipe, the possibilities branch out in every direction. Swap the chocolate sandwich cookies for peanut butter or lemon varieties to create entirely new flavor profiles. Mint Oreos paired with a chocolate ganache drizzle turn these into after-dinner mints in cup form. For a seasonal twist, use pumpkin spice cookies in the fall or gingerbread cookies during the holidays, adjusting the sugar in the filling if the cookies are already sweetened.
Layering adds visual interest and complexity. Try alternating the filling with crushed cookies or a thin spread of fruit preserves—raspberry jam works especially well with the vanilla notes in the cream cheese. If you’re feeling ambitious, fold in mini chocolate chips, chopped nuts, or even crumbled brownies for extra texture. Just remember that heavier mix-ins can weigh down the filling, so add them sparingly.
For an upscale presentation at a Dessert Restaurant-style event, serve the cups on a tiered stand with edible flowers or gold leaf garnishes. A drizzle of chocolate sauce or caramel creates a bakery-quality finish that takes seconds to apply. If you’re catering to dietary restrictions, dairy-free cream cheese and coconut cream can replace their conventional counterparts, though the texture will be slightly less stable.
Troubleshooting Common Issues
If your filling turns out runny, you likely underwhipped the cream or used cream cheese that wasn’t fully softened. The mixture should thicken noticeably as you beat it, forming peaks that hold their shape when the mixer is lifted. If it still seems loose after five minutes of whipping, chill the entire bowl for fifteen minutes and try again. Adding a tablespoon of powdered sugar can also help stabilize the cream.
Crumbly crusts happen when there’s not enough butter to bind the cookie crumbs. The mixture should feel like wet sand—moldable but not dripping. If your crust is falling apart, melt an extra tablespoon of butter and stir it in until the texture improves. On the flip side, too much butter creates a greasy base that seeps into the filling. Stick to the measurements and adjust only if absolutely necessary.
Separated filling occurs when ingredients are at drastically different temperatures. Warm cream cheese mixed with ice-cold cream can cause the fats to seize, resulting in a curdled appearance. To fix it, let all ingredients come to a similar temperature before mixing, or blend the separated mixture with an immersion blender until smooth. It won’t have the same fluffy texture, but it’ll still taste fine.
Storage and Make-Ahead Tips
These cups hold up beautifully in the fridge for two to three days, making them a stress-free option for advance prep. Store them with lids on to prevent the filling from absorbing fridge odors or drying out. If you’re stacking multiple layers in a container, place a sheet of parchment paper between each tier to avoid smudging the tops. For outdoor events, pack the cups in a cooler with ice packs—they can sit at room temperature for up to two hours before the filling starts to soften noticeably.
Freezing is possible but not ideal. The cream cheese filling tends to separate slightly when thawed, and the cookie crust can become soggy as ice crystals melt. If you must freeze them, wrap each cup tightly in plastic wrap and store in an airtight container for up to one month. Thaw in the fridge overnight, not at room temperature, to minimize texture changes. Freshly made cups always taste better, so plan accordingly.
Smart Ingredient Substitutions
If heavy cream isn’t available, whole milk mixed with melted butter can work in a pinch—use three-quarters cup milk and one-quarter cup melted butter for every cup of cream. The filling won’t be quite as rich or stable, but it’ll still taste good. Greek yogurt can replace half the cream cheese for a tangier flavor, though you’ll need to add a tablespoon of cornstarch to prevent the filling from becoming too loose.
For a lower-sugar version, swap the granulated sugar for a powdered erythritol blend, keeping the measurements the same. The filling will be slightly less sweet but still perfectly enjoyable. Alternatively, use sweetened condensed milk in place of the sugar and half the cream—this shortcut adds richness and cuts down on whipping time. Just reduce the condensed milk amount if you prefer a less sweet dessert.
Gluten-free chocolate sandwich cookies work seamlessly in this recipe, making it accessible for guests with dietary restrictions. Check the label to ensure they’re certified gluten-free if cross-contamination is a concern. The texture might differ slightly depending on the brand, but the overall result will still be delicious.
Frequently Asked Questions
Can I use reduced-fat cream cheese?
You can, but the filling won’t be as stable or rich. Full-fat cream cheese contains more fat, which helps the mixture hold its shape and provides a creamier mouthfeel. If you do use reduced-fat, expect a softer filling that may not pipe as neatly.
How many cups does this recipe make?
About twenty-eight 2-ounce cups, though the exact number depends on how full you fill each one. Piping to three-quarters full ensures there’s room for the topping without overflow.
Can I make these in a large pan instead of individual cups?
Absolutely. Press the crust into an 8×8-inch baking pan, spread the filling on top, and chill. Cut into squares when ready to serve. The presentation won’t be as polished, but the flavor remains the same.
What’s the best way to crush cookies without a food processor?
Seal them in a heavy-duty zip-top bag and roll over them with a rolling pin or wine bottle. It takes a bit more effort, but you’ll get similarly fine crumbs with a little patience.
Can I add food coloring to the filling?
Yes, gel food coloring works best since it won’t thin out the filling. Add a few drops during the whipping stage until you reach the desired shade. Pastel colors look especially pretty for themed parties.
How do I prevent the crust from sticking to the bottom of the cup?
The butter in the crust naturally creates a slight barrier, but if you’re concerned, lightly spray the cups with nonstick cooking spray before adding the crumbs. This works particularly well with reusable cups.
Can I use store-bought whipped topping instead of heavy cream?
You can fold whipped topping into the cream cheese mixture, but the filling will be sweeter and less stable. If you go this route, reduce the sugar by half and skip the whipping step just mix the cream cheese, sugar, and whipped topping together until smooth.
Cookies and Cream Dessert Cups
Equipment
- Food processor or zip-top bag with rolling pin
- Electric hand mixer
- Mixing bowls
- Piping bag with round tip
- 2-ounce plastic dessert cups with lids
Ingredients
Cookie Crust
- 2 cups chocolate sandwich cookies, finely crushed about 20 cookies
- 4 tablespoons unsalted butter, melted
Cookies and Cream Filling
- 8 ounces cream cheese, softened to room temperature
- 1/2 cup granulated sugar
- 1 cup heavy whipping cream, cold
- 1 teaspoon vanilla extract
- 1/2 cup crushed chocolate sandwich cookies for folding into filling
Topping
- 28 mini Oreo cookies or additional cookie crumbs
Instructions
- Pulse chocolate sandwich cookies in a food processor until finely crushed, or place in a sealed zip-top bag and crush with a rolling pin until crumbs are uniform and fine.
- Transfer cookie crumbs to a medium bowl and stir in melted butter until mixture resembles wet sand and holds together when pressed.
- Portion approximately 1 tablespoon of cookie mixture into each 2-ounce plastic cup. Use the bottom of an empty cup to firmly press crumbs into an even layer at the bottom.
- In a large mixing bowl, beat softened cream cheese and granulated sugar with an electric mixer on medium speed for 2 minutes until smooth and fluffy, scraping down sides as needed.
- Add cold heavy whipping cream and vanilla extract to the cream cheese mixture. Increase mixer speed to medium-high and whip for 3-4 minutes until stiff peaks form and filling holds its shape.
- Gently fold in 1/2 cup crushed chocolate sandwich cookies using a spatula, being careful not to deflate the whipped mixture.
- Transfer filling to a large piping bag fitted with a wide round tip. Pipe filling into each cup until about three-quarters full, leaving room for garnish.
- Top each dessert cup with a mini Oreo cookie or sprinkle of additional cookie crumbs. Seal cups with lids and refrigerate for at least 2 hours before serving.