There’s something magical about the first bite of a perfectly crispy taco shell that gives way to warm, melty cheese and savory beef. I still remember the first time I tried making Oven-Baked Cheesy Tacos on a particularly chaotic Tuesday evening my stovetop was broken, dinner was due in 30 minutes, and I had a family of hungry faces staring at me. Out of necessity came discovery.
I lined up those hard shells in a baking dish, stuffed them with everything I had, and slid them into the oven. What came out wasn’t just dinner; it was a revelation. The shells stayed upright, the cheese bubbled into golden pools, and cleanup? Almost nonexistent. Since that night, this has become my go-to when I need something fast, satisfying, and ridiculously tasty without the usual taco mess.
What Makes These Tacos Different
Unlike traditional stovetop tacos where shells crack and fillings spill everywhere, Oven-Baked Cheesy Tacos hold their shape beautifully. The oven does the heavy lifting while you prep toppings or catch your breath. Cheese melts evenly across every shell, creating that irresistible pull-apart moment. Plus, you can make ten tacos at once instead of awkwardly juggling three at a time on a skillet. It’s efficient, foolproof, and honestly tastes better because the flavors meld together during baking.
Ingredients You’ll Need
For the filling, grab one pound of ground beef—or substitute with ground turkey or chicken if you prefer something lighter. You’ll also need a tablespoon of olive oil for sautéing, one small diced onion, and two minced garlic cloves. Taco seasoning (either a packet or your homemade blend) brings the signature flavor, while half a cup of tomato sauce or salsa adds moisture and tang. Season with salt and pepper to your liking.
For assembly, gather ten small taco shells—flour or corn both work, just warm them slightly so they don’t crack. You’ll need two cups of shredded cheddar cheese or a Mexican blend. Fresh toppings bring brightness: one cup of shredded lettuce, half a cup of diced tomatoes, half a cup of diced red onion, and a quarter cup of chopped fresh cilantro. Optional extras like sour cream, jalapeños, guacamole, and hot sauce let everyone customize their plate.
Step-by-Step Instructions
Preparing the Filling
Preheat your oven to 375°F (190°C) and lightly grease a baking dish or line it with foil. Heat a tablespoon of olive oil in a skillet over medium heat. Once shimmering, add your diced onion and minced garlic. Sauté for about two to three minutes until fragrant and the onion turns soft. Add the ground beef, breaking it apart with a wooden spoon or spatula as it browns. Stir in the taco seasoning, tomato sauce, salt, and pepper. Let everything simmer together for five minutes so the flavors really get to know each other. The mixture should be thick, not soupy.
Assembling Your Oven-Baked Cheesy Tacos
This is where things get fun. Take your slightly warmed taco shells and spoon the meat mixture into each one. Don’t be shy—pack them generously, but leave a little room at the top for cheese. Sprinkle shredded cheese over each filled shell, making sure it cascades down into the filling. Stand the shells side by side in your prepared baking dish. They should support each other like little edible soldiers. This setup keeps them upright and ensures even baking.

Baking to Perfection
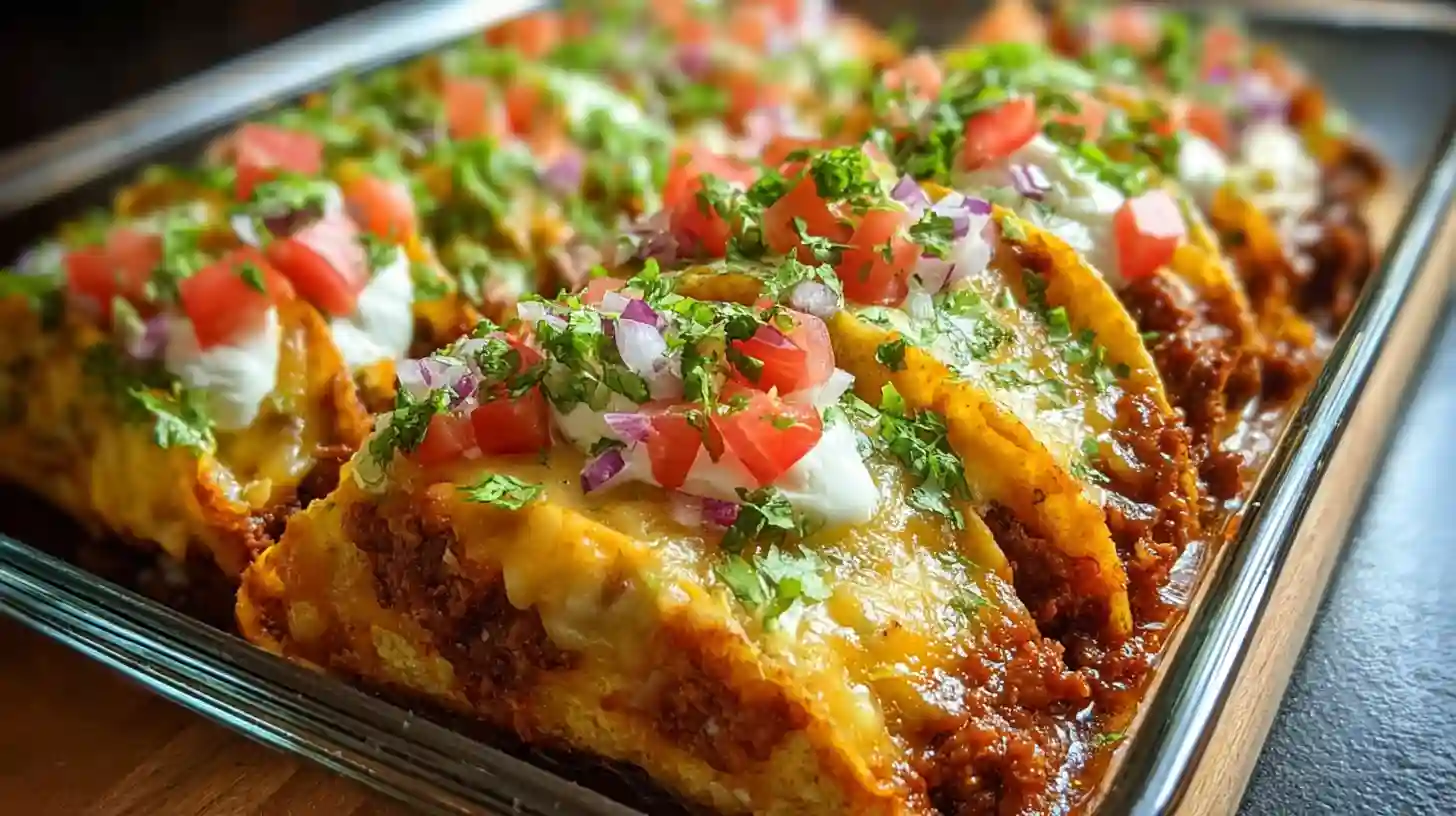
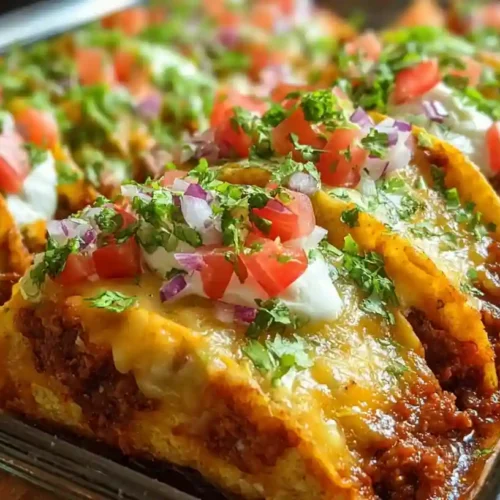
Slide the baking dish into your preheated oven and bake for ten to fifteen minutes. Watch for the cheese to bubble and turn golden at the edges, and for the taco shells to develop a light crispness. Your kitchen will smell incredible during this time—savory beef, toasted corn, melting cheese. Once done, pull them out and let them cool for just a minute. Top with fresh lettuce, diced tomatoes, red onion, and cilantro. Add dollops of sour cream, scoops of guacamole, or drizzles of hot sauce based on your mood.

Pro Tips for Success
- Warm your taco shells slightly before filling to prevent cracking during assembly
- Don’t overfill the shells or they’ll topple over in the oven
- Try mixing different cheeses like pepper jack or queso fresco for unique flavors
- Let the tacos rest for a minute after baking so the cheese sets slightly and holds better
- Make a double batch and freeze assembled tacos before baking for future quick meals
Creative Variations
Swap the ground beef for seasoned black beans or lentils to create a satisfying vegetarian version. Add diced bell peppers and corn to the filling for extra texture and color. If you like heat, mix diced jalapeños directly into the meat or use pepper jack cheese. For a breakfast twist, replace the beef with scrambled eggs and breakfast sausage, then top with salsa verde. Gluten-free eaters can use certified gluten-free taco shells or even large lettuce leaves as wraps.
Troubleshooting Common Issues
If your shells keep breaking, they’re probably too cold or too old. Warm them gently in the microwave for about ten seconds wrapped in a damp paper towel. If cheese isn’t melting evenly, make sure you’re using freshly shredded cheese—pre-shredded varieties often have anti-caking agents that affect melting. Soggy shells usually mean the filling was too wet, so drain excess liquid from your cooked meat before assembly. If tacos tip over during baking, pack them tighter together or use a smaller dish where they naturally support one another.
Ingredient Substitutions
- Replace ground beef with ground turkey, chicken, or plant-based crumbles
- Use Greek yogurt instead of sour cream for a lighter topping
- Substitute tomato sauce with your favorite salsa for added flavor depth
- Try flour tortillas instead of hard shells for a softer texture
- Use dairy-free cheese to make these tacos vegan-friendly
Storage and Reheating
Store leftover Oven-Baked Cheesy Tacos in an airtight container in the refrigerator for up to three to four days. Reheat them in a 350°F oven for about eight to ten minutes to restore crispness—microwaving works in a pinch but makes shells soft. You can freeze assembled but unbaked tacos for up to two months. Wrap them tightly in foil or freezer-safe bags. When ready to eat, bake directly from frozen, adding an extra five to seven minutes to the cooking time.
Serving Suggestions
Pair your Oven-Baked Cheesy Tacos with a crisp garden salad dressed lightly with lime vinaigrette. Spanish rice or cilantro-lime quinoa makes an excellent side that soaks up any extra toppings. For drinks, consider chilled margaritas, Mexican beer with lime, or refreshing agua fresca. Serve everything on a large platter garnished with extra lime wedges and cilantro sprigs for a festive presentation that encourages everyone to dig in and build their perfect bite.
Frequently Asked Questions
Can I prepare Oven-Baked Cheesy Tacos ahead of time?
Absolutely. Assemble the tacos completely, cover the baking dish with foil, and refrigerate for up to 24 hours. When ready to serve, bake as directed, adding a few extra minutes if they’re cold from the fridge.
What’s the best cheese for these tacos?
Cheddar melts beautifully and has great flavor, but a Mexican blend with Monterey Jack and queso quesadilla adds creaminess. Pepper jack gives a spicy kick if you’re into that.
Can I use soft tortillas instead of hard shells?
Yes, but the technique changes slightly. Roll the filled soft tortillas into enchiladas and place them seam-side down in the baking dish. They’ll bake into something closer to baked taquitos.
How do I keep the shells from getting soggy?
Make sure your meat filling isn’t too watery—drain any excess grease and let the mixture thicken during the simmer phase. Add wet toppings like tomatoes and lettuce only after baking.
Are Oven-Baked Cheesy Tacos kid-friendly?
Definitely. Kids love the crispy shells and melty cheese. You can tone down the spice by using mild taco seasoning and letting them add their own toppings at the table.
Can I freeze these tacos?
Yes. Freeze them before baking, wrapped individually or in a freezer-safe container. Bake straight from frozen when you’re ready, just add a few extra minutes to the cooking time.
What should I serve with Oven-Baked Cheesy Tacos?
Mexican rice, refried beans, chips with salsa or guacamole, and a simple side salad all complement these tacos beautifully. For drinks, try horchata, limeade, or a cold cerveza.
Oven-Baked Cheesy Tacos
Equipment
- Baking dish (9×13 inch)
- Large skillet
- Wooden spoon or spatula
Ingredients
For the Filling
- 1 lb ground beef or ground turkey/chicken
- 1 tbsp olive oil
- 1 small onion, diced
- 2 cloves garlic, minced
- 1 packet taco seasoning or homemade blend
- 0.5 cup tomato sauce or salsa
- salt and pepper to taste
For Assembly
- 10 small taco shells flour or corn, slightly warmed
- 2 cups shredded cheddar cheese or Mexican blend
- 1 cup lettuce, shredded
- 0.5 cup tomatoes, diced
- 0.5 cup red onion, diced
- 0.25 cup fresh cilantro, chopped
- optional toppings sour cream, jalapeños, guacamole, hot sauce
Instructions
- Preheat oven to 375°F (190°C). Lightly grease a baking dish or line with foil.
- Heat olive oil in a skillet over medium heat. Add diced onion and minced garlic, sauté for 2-3 minutes until fragrant.
- Add ground beef to the skillet, breaking it apart as it cooks. Stir in taco seasoning, tomato sauce, salt, and pepper. Simmer for 5 minutes until mixture thickens.
- Fill each taco shell with the meat mixture. Sprinkle shredded cheese generously over each filled shell.
- Arrange filled taco shells standing upright side by side in the prepared baking dish.
- Bake for 10-15 minutes until cheese is melted and bubbly and shells are lightly crispy.
- Remove from oven and top with fresh lettuce, diced tomatoes, red onion, and cilantro. Add optional toppings as desired.
Notes
- Warm taco shells slightly before filling to prevent cracking
- Don’t overfill shells or they may tip over during baking
- Can substitute with ground turkey, chicken, or black beans for variation
- These tacos can be assembled ahead and refrigerated, then baked just before serving
- Freeze assembled unbaked tacos for up to 2 months