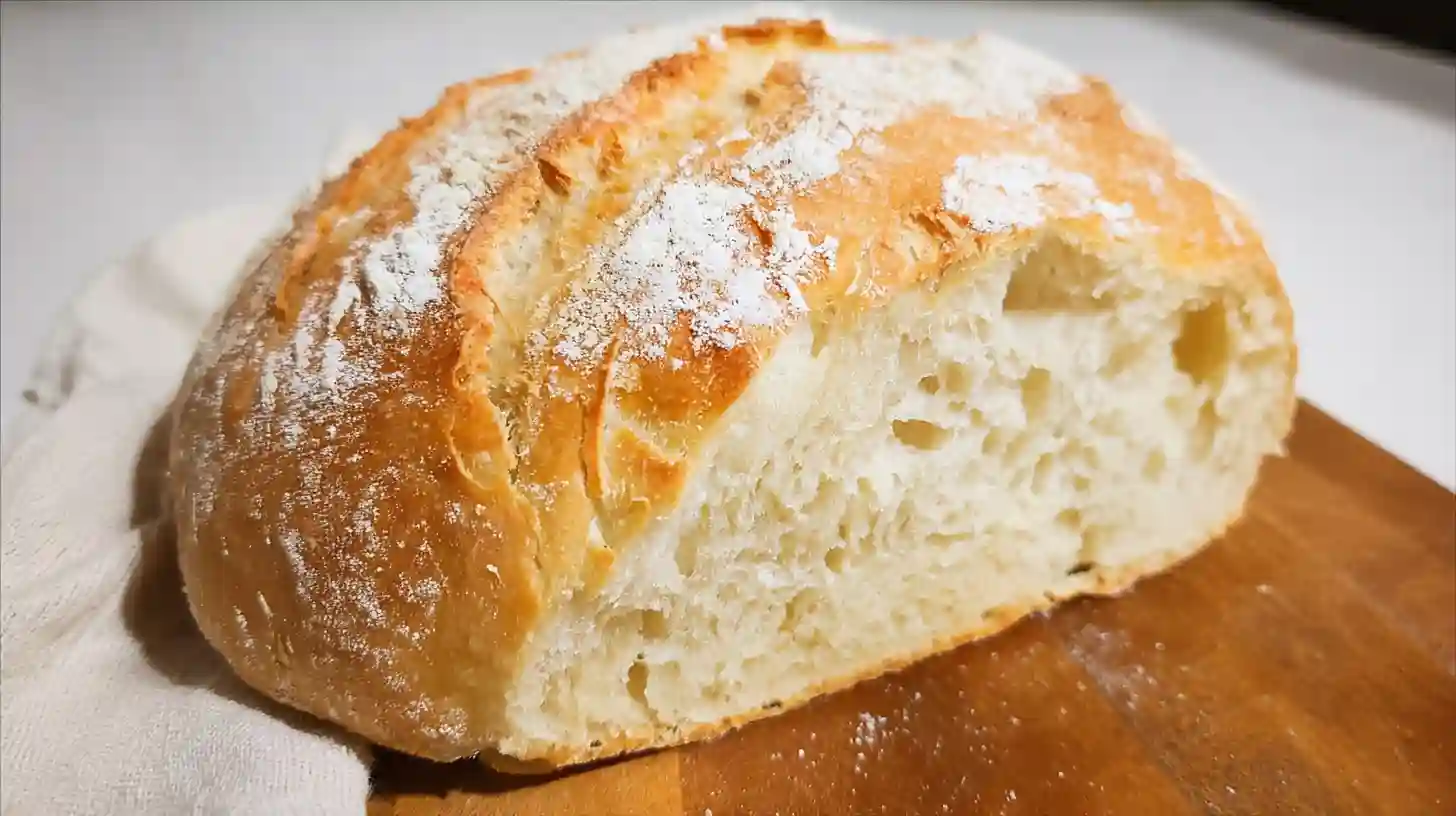
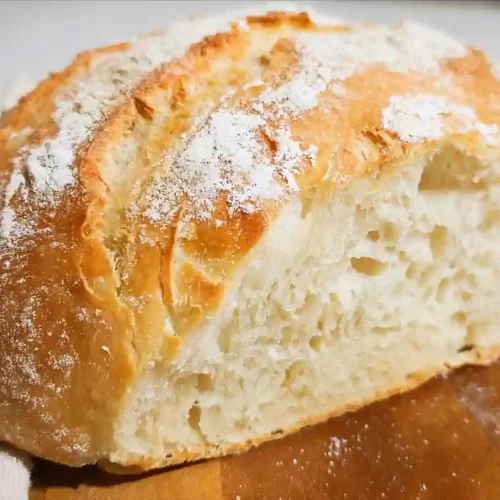
Some of the best things in a kitchen come from almost nothing. This 3 ingredient artisan bread is proof of that. Flour, water, and yeast. That is the entire list. No butter, no eggs, no mixer, no kneading. You mix it the night before, let time do the work, and bake it the next day in a hot Dutch oven. The crust crackles. The inside stays soft and open. It tastes like something from a bakery, and nobody needs to know how little effort actually went into it.
What You Need for This 3 Ingredient Artisan Bread
The ingredient list is short, but each one matters. Use bread flour if you have it – it gives the loaf better structure and chew. All-purpose flour works too, just with a slightly softer result. Instant yeast is easiest since it does not need to be proofed first. And for water, lukewarm is the goal, somewhere around 100°F. Too hot and the yeast dies, too cold and the dough barely rises.
- 3 cups (360g) bread flour or all-purpose flour
- 1/4 teaspoon instant yeast
- 1 1/2 cups (355ml) lukewarm water
That is it. You can add 1 teaspoon of salt if you want – technically that makes it a 4 ingredient homemade bread, but the flavor difference is significant and most people include it. Completely your call.
How to Make This Simple Artisan Bread Recipe Step by Step
This is a no-knead method, which means the technique is hands-off once you mix the dough. The long rest does all the gluten development for you.
- In a large bowl, whisk together the flour and yeast.
- Pour in the lukewarm water and stir with a wooden spoon or your hand until a shaggy, sticky dough forms. Do not overmix – just combine everything.
- Cover the bowl tightly with plastic wrap or a clean kitchen towel.
- Leave at room temperature for 12 to 18 hours. Overnight is ideal.
- When the dough is ready, it will look bubbly on the surface and slightly collapsed in the center. That is exactly right.
- Preheat your oven to 450°F (230°C) with a Dutch oven inside for at least 30 minutes.
- Turn the dough out onto a floured surface and fold it a few times to shape it loosely into a round. Do not punch it down or overwork it.
- Place it seam-side down on a sheet of parchment paper.
- Lower the dough and parchment into the hot Dutch oven. Score the top with a knife if you like.
- Bake covered for 30 minutes, then uncover and bake for another 10 to 15 minutes until the crust is deep golden brown.
- Cool on a wire rack for at least 20 minutes before slicing.
Pro Tips for a Better Loaf Every Time
The Dutch oven is not optional here – it traps steam during the first bake, which is what gives this super easy homemade artisan bread its signature crackly crust. A regular baking sheet will not give you the same result.
Do not skip the preheat. The dough hitting a cold pot instead of a scorching one makes a real difference in how the loaf rises in the oven. Also, resist cutting into it right out of the oven. The crumb needs time to finish setting, and cutting too early compresses everything you worked for.

Ingredient Swaps and Easy Variations
If you only have active dry yeast, use 1/2 teaspoon instead and dissolve it in the water first for about 5 minutes before mixing. Whole wheat flour can replace up to half the bread flour for a denser, nuttier loaf. Going full whole wheat tends to make the bread heavy, so a 50/50 blend is a good middle ground for fresh homemade everyday bread with a bit more depth.
Want to add more flavor without complicating the recipe? Stir in a handful of rosemary and a few tablespoons of olive oil, or try seeds like sesame or sunflower on top before baking. Cheese folded into the dough before shaping works beautifully too. Any of these tweaks keeps the spirit of an easy 4 ingredient artisan bread or simpler while adding something interesting.
What Goes Wrong and How to Fix It
If the bread comes out flat and dense, the most common cause is old yeast. Yeast loses its activity over time, especially once opened. Check the expiration date and store it in the freezer after opening. Another issue is water that was too hot – above 110°F kills yeast quickly, so err on the side of slightly cool rather than warm.
A pale crust usually means the oven was not hot enough or the Dutch oven lid came off too early. Stick to the covered bake first, then uncover to brown. If the bottom is burning before the top colors, slide a second baking sheet underneath the Dutch oven to diffuse the heat.
Storing and Serving Your Bread
This loaf is best the day it is baked. After that, store it cut-side down on a cutting board or loosely wrapped in a clean cloth. Avoid plastic wrap for the whole loaf – it softens the crust quickly. For longer storage, slice the bread and freeze it. Slices toast straight from the freezer perfectly, which makes this four ingredient artisan bread a practical thing to keep on hand through the week.
Serve it with soup, torn alongside pasta, toasted with olive oil, or just with butter while it is still slightly warm. It works at dinner, breakfast, or anywhere in between.
FAQ
Can I make this bread without a Dutch oven?
You can bake it in a covered oven-safe pot or even a deep cast iron skillet with foil tented over the top. The key is trapping steam during the first 30 minutes of baking. Results will vary slightly but it still produces a good loaf.
Why is my dough so sticky?
This dough is supposed to be sticky – that is normal for a high-hydration no-knead recipe. Use a floured surface and floured hands when shaping, and do not try to make it smooth. Handling it lightly and quickly gets better results than trying to firm it up.
Can I shorten the rise time?
You can increase the yeast to 1 teaspoon and let the dough rise in a warm spot for about 4 hours. The flavor will be less developed compared to the overnight method, but the bread still bakes up well. Long and slow gives you better taste and a more open crumb.
Does this recipe work with gluten-free flour?
Standard gluten-free flour blends do not behave the same way in a no-knead recipe. The structure depends on gluten development over time, so the result with a 1:1 GF substitute tends to be crumbly and flat. A dedicated gluten-free artisan bread recipe would give better results.
How do I know when the bread is fully baked?
Tap the bottom of the loaf. If it sounds hollow, it is done. You can also use an instant-read thermometer – the internal temperature should reach around 200°F to 210°F. The crust should be a deep amber brown, not just pale gold.
3 Ingredient Artisan Bread
Equipment
- Large mixing bowl
- Dutch Oven
- Parchment paper
- Wire rack
Ingredients
- 3 cups bread flour or all-purpose flour 360g, bread flour preferred
- 1/4 tsp instant yeast
- 1 1/2 cups lukewarm water 355ml, around 100°F
Instructions
- Mix flour and yeast together in a large bowl. Pour in the lukewarm water and stir until a shaggy sticky dough forms.
- Cover the bowl tightly with plastic wrap and leave at room temperature for 12 to 18 hours.
- Preheat your oven to 450°F (230°C) with a Dutch oven inside for at least 30 minutes.
- Turn the dough onto a floured surface and fold gently into a round shape. Place seam-side down on parchment paper.
- Lower the dough with parchment into the hot Dutch oven. Score the top with a knife if desired.
- Bake covered for 30 minutes, then uncover and bake 10 to 15 more minutes until the crust is deep golden brown.
- Cool on a wire rack for at least 20 minutes before slicing.
Notes
- Add 1 tsp salt for better flavor – technically makes it 4 ingredients but highly recommended.
- Dutch oven is essential for a proper crackling crust.
- Do not cut the bread too soon – let it rest at least 20 minutes after baking.
- Store cut-side down on a board or freeze slices for up to 2 months.