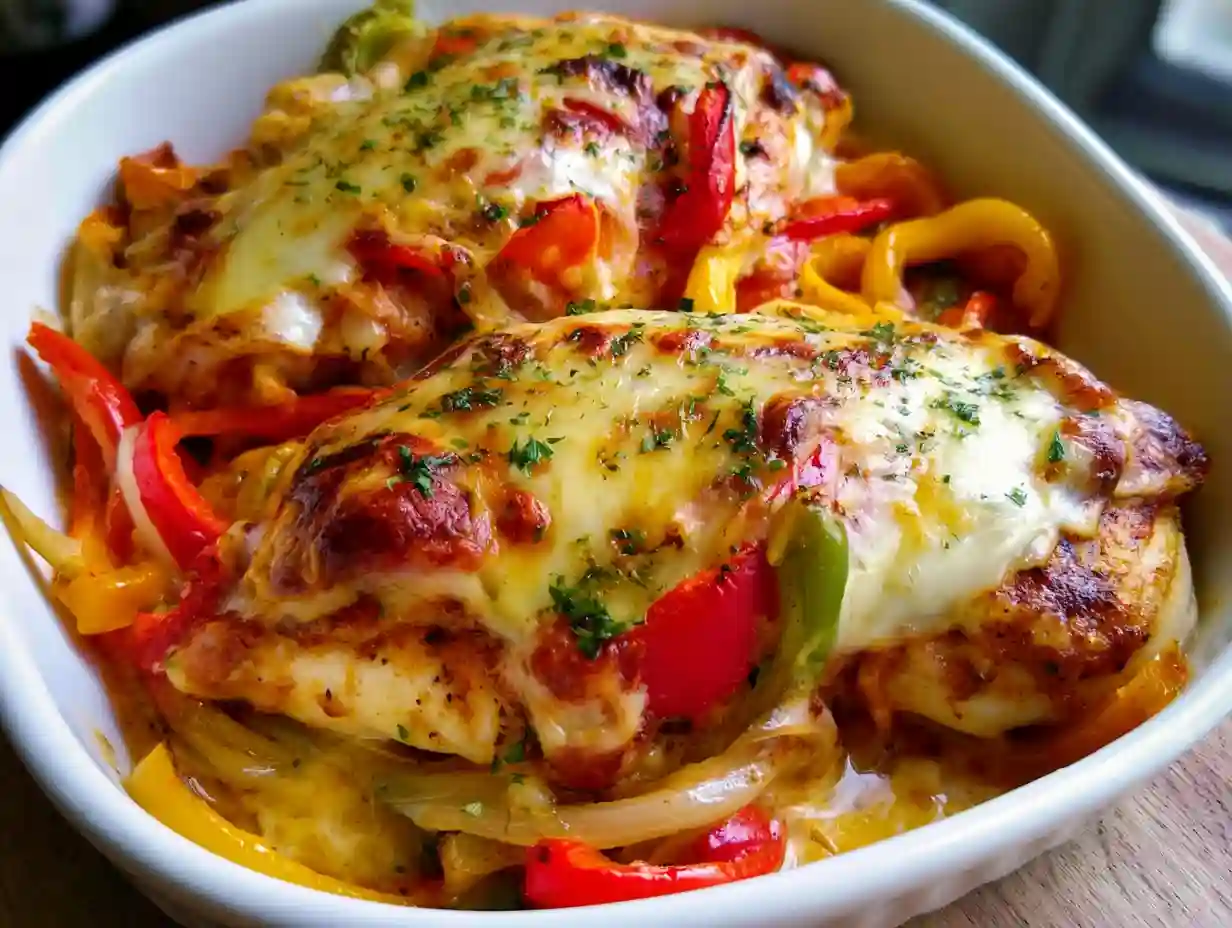
There’s something magical about pulling a bubbling, golden dish from the oven and watching your family’s faces light up. This Cheesy Baked Chicken Breast And Peppers recipe has become my go-to for busy weeknights when I need dinner on the table without sacrificing flavor. The combination of tender chicken, sweet bell peppers, and three types of cheese creates a comfort food masterpiece that never fails to impress.
I first developed this recipe on a rainy Tuesday when my pantry was running low. What started as a simple chicken dinner transformed into one of my most requested baked chicken recipes. The peppers caramelize beautifully while the chicken stays incredibly moist, and that cheese topping? Absolute perfection. Whether you’re looking for easy chicken breast ideas or need reliable poultry recipes for meal prep, this dish delivers every single time.
Why This Cheesy Baked Chicken Recipe Works
The secret lies in the layering technique. Sliced peppers create a natural bed that keeps the chicken from drying out while infusing it with sweetness. The cheese blend melts into a crispy, golden crust that locks in moisture. This method works beautifully for chicken main dishes because it requires minimal hands-on time yet produces restaurant-quality results.
Many baked chicken recipes call for complicated marinades or endless steps. Not this one. You’ll spend about 15 minutes prepping, then let the oven do the heavy lifting. The high heat creates beautiful browning while the peppers release their juices, creating a natural sauce that coats every bite. It’s one of those chicken dishes recipes that looks fancy but feels effortless.
Ingredients You’ll Need
Quality ingredients make all the difference in baked chicken breast recipes. Here’s what you need for this cheesy baked chicken and peppers dish:
- 4 boneless skinless chicken breasts (about 6 oz each), pounded to even thickness
- 3 large bell peppers (mix of red, yellow, and orange), sliced into strips
- 1 medium onion, sliced
- 3 cloves garlic, minced
- 2 tablespoons olive oil
- 1 teaspoon dried Italian seasoning
- 1 teaspoon smoked paprika
- Salt and freshly ground black pepper to taste
- 1 cup shredded mozzarella cheese
- 1/2 cup shredded Parmesan cheese
- 1/2 cup cream cheese, softened and cubed
- Fresh parsley for garnish (optional)
The pepper variety matters here. Using multiple colors not only makes the dish visually stunning but also adds different flavor notes. Red peppers bring sweetness, yellow peppers add mild tang, and orange peppers offer a balanced profile. This is one of those peppers recipes where the vegetable becomes the star alongside the protein.
Step-by-Step Instructions
Preheat your oven to 400°F (200°C). This temperature ensures the chicken cooks through while developing that gorgeous golden crust on top. While the oven heats, prepare your baking dish by lightly greasing a 9×13 inch pan with cooking spray or olive oil.
Start by tossing the sliced peppers and onion with one tablespoon of olive oil, half the garlic, Italian seasoning, salt, and pepper. Spread this mixture evenly across the bottom of your prepared baking dish. This creates the flavorful foundation that makes these chicken breast recipes baked so special.
Pat the chicken breasts completely dry with paper towels. This step is crucial for achieving proper browning. Rub the remaining olive oil over each breast, then season generously with smoked paprika, remaining garlic, salt, and pepper. Place the seasoned chicken directly on top of the pepper mixture.
Bake for 20 minutes, then remove from the oven. Top each chicken breast with cubed cream cheese, followed by mozzarella and Parmesan. Return to the oven and bake for another 10-15 minutes until the chicken reaches an internal temperature of 165°F and the cheese is bubbly and golden.

Pro Tips for Perfect Results
Pound your chicken breasts to even thickness before cooking. This ensures uniform cooking and prevents dry edges. Place breasts between plastic wrap and gently pound with a meat mallet or heavy skillet until they’re about 3/4 inch thick throughout.
Don’t skip drying the peppers after slicing. Excess moisture can make the dish watery. Pat them with a clean kitchen towel before tossing with oil. This simple step keeps your baked chicken recipes from turning soggy.
Let the dish rest for 5 minutes after removing from the oven. This allows the cheese to set slightly and the juices to redistribute through the chicken. It’s tempting to dig in immediately, but patience pays off with cleaner slices and better texture.
Variations to Try
Make it spicy by adding sliced jalapeños with the bell peppers or using pepper jack cheese instead of mozzarella. For a Mediterranean twist, add sun-dried tomatoes, kalamata olives, and feta cheese. You can also swap the chicken for bone-in thighs, which add extra richness to this poultry recipes collection.
Low-carb dieters can serve this over cauliflower rice or zucchini noodles. For heartier appetites, it pairs beautifully with crusty bread, garlic mashed potatoes, or buttered egg noodles. The versatility makes it perfect for different dietary needs and preferences.
Troubleshooting Tips
If your cheese isn’t browning, switch to broil for the last 2-3 minutes. Watch carefully to prevent burning. For chicken that’s cooking too quickly on top, tent loosely with foil during the final baking stage.
Watery peppers usually mean they weren’t dried properly before baking. Next time, pat them thoroughly after slicing. You can also roast the peppers separately for 10 minutes before adding the chicken to evaporate excess moisture.
Ingredient Substitutions
No fresh bell peppers? Use 2 cups of frozen pepper strips, thawed and patted dry. Onion powder (1 teaspoon) works in place of fresh onion in a pinch. For the cheese blend, Italian cheese blends or Mexican four-cheese mixes work well as alternatives.
Chicken thighs can replace breasts for richer flavor and more forgiving cooking. Just increase the baking time by 5-10 minutes. For dairy-free versions, use plant-based cheese alternatives and coconut cream instead of cream cheese.
Storage and Serving Suggestions
Store leftovers in an airtight container in the refrigerator for up to 4 days. Reheat individual portions in the microwave for 1-2 minutes, or warm the entire dish in a 350°F oven for 15-20 minutes. This makes it excellent for meal prep and busy chicken main dishes rotations.
Freeze cooked portions for up to 3 months. Thaw overnight in the refrigerator before reheating. Note that the cheese texture may change slightly after freezing, but the flavor remains delicious. Serve with a simple green salad and garlic bread for a complete meal.
Frequently Asked Questions
Can I make this ahead of time?
Absolutely! Assemble the dish up to 24 hours in advance, cover, and refrigerate. Add 5-10 minutes to the baking time since you’re starting with cold ingredients. This makes it perfect for meal planning and stress-free dinner prep.
What type of peppers work best?
Bell peppers in any color work wonderfully. Red peppers are sweetest, green peppers offer a more bitter note, and yellow/orange peppers provide balanced flavor. Avoid hot peppers unless you specifically want heat in your cheesy baked chicken.
Can I use frozen chicken breasts?
It’s best to thaw chicken completely before baking for even cooking. If using frozen, increase baking time by 15-20 minutes and ensure the internal temperature reaches 165°F. Thawed chicken produces superior texture and browning.
How do I know when the chicken is done?
Use an instant-read thermometer inserted into the thickest part of the breast. It should read 165°F. The juices should run clear, and the meat should feel firm but not tough. Never rely solely on cooking time as ovens vary.
Can I make this in a slow cooker?
Yes, though the cheese won’t brown. Cook on low for 4-6 hours or high for 2-3 hours. Add the cheese during the last 30 minutes and leave the lid slightly ajar to help it melt properly. The texture will be softer than oven-baked.
What sides pair well with this dish?
This cheesy baked chicken and peppers pairs beautifully with rice pilaf, quinoa, roasted potatoes, or crusty bread for soaking up the juices. A light salad with lemon dressing balances the richness, while steamed broccoli or green beans add color and nutrition.
Is this recipe gluten-free?
Yes, this recipe is naturally gluten-free as written. Just verify that your cheese and seasonings don’t contain hidden gluten. Always check labels if you have celiac disease or gluten sensitivity, as some processed cheeses may contain additives.
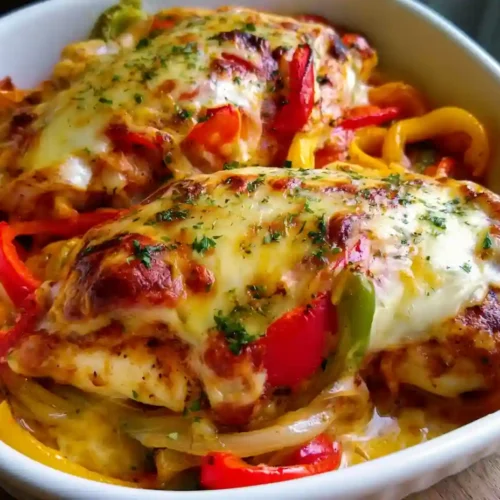
Cheesy Baked Chicken Breast And Peppers

Equipment
- 9×13-inch baking dish
- Instant-read thermometer
- Meat mallet
- Cutting board
- Chef’s knife
Ingredients
- 4 boneless skinless chicken breasts about 6 oz each, pounded to even thickness
- 3 large bell peppers red, yellow, and orange, sliced into strips
- 1 medium onion sliced
- 3 cloves garlic minced
- 2 tablespoons olive oil
- 1 teaspoon dried Italian seasoning
- 1 teaspoon smoked paprika
- salt and freshly ground black pepper to taste
- 1 cup shredded mozzarella cheese
- 1/2 cup shredded Parmesan cheese
- 1/2 cup cream cheese softened and cubed
- fresh parsley for garnish, optional
Instructions
- Preheat oven to 400°F (200°C). Lightly grease a 9×13 inch baking dish with cooking spray or olive oil.
- Toss peppers and onion with 1 tablespoon olive oil, half the garlic, Italian seasoning, salt, and pepper. Spread evenly in the prepared baking dish.
- Pat chicken breasts dry with paper towels. Rub with remaining olive oil and season with smoked paprika, remaining garlic, salt, and pepper.
- Place chicken on top of the pepper mixture. Bake for 20 minutes.
- Top each breast with cubed cream cheese, mozzarella, and Parmesan. Return to oven and bake 10-15 minutes more until chicken reaches 165°F internally and cheese is golden and bubbly.
- Rest for 5 minutes before serving. Garnish with fresh parsley if desired.
Notes
- Pound chicken to even thickness for uniform cooking
- Pat peppers dry after slicing to prevent watery results
- Let dish rest before serving for cleaner slices
- Use instant-read thermometer to ensure doneness
- Can be assembled ahead and refrigerated up to 24 hours before baking